


Photos are a nice addition to hang on plain walls, but the photo itself may not be very charming. There needs to be a way to improve it — And there is! Transfer your image onto a wooden board and hang it in your room.
#1 — Get the supplies
The essentials first:
- Laser printed photo
- Wood (if you want, cut to the same size as your photo)
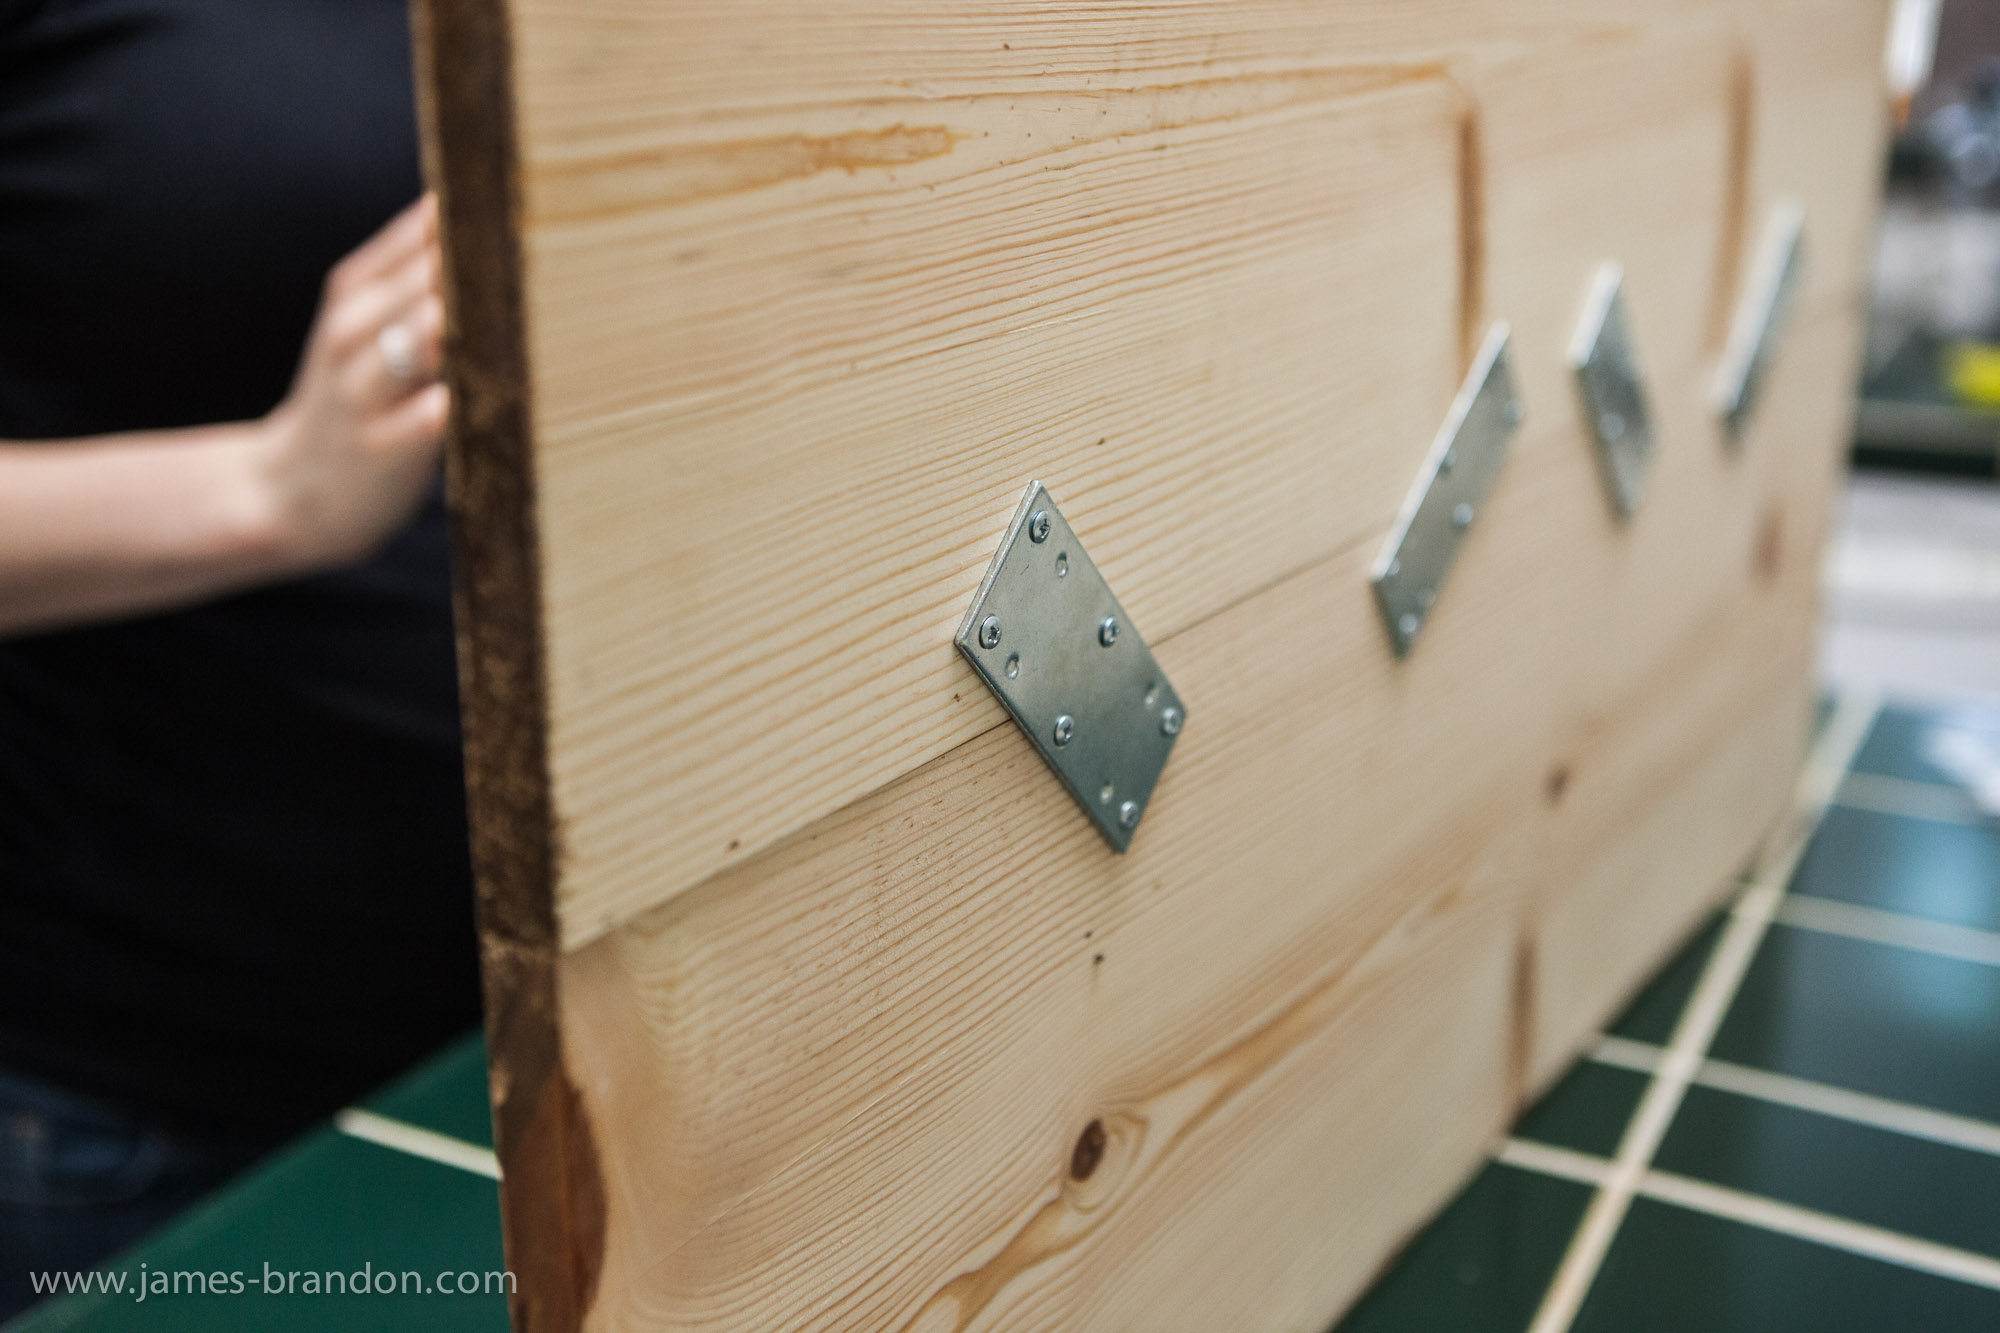
- Fastening brackets (only if multiple pieces of wood are used)
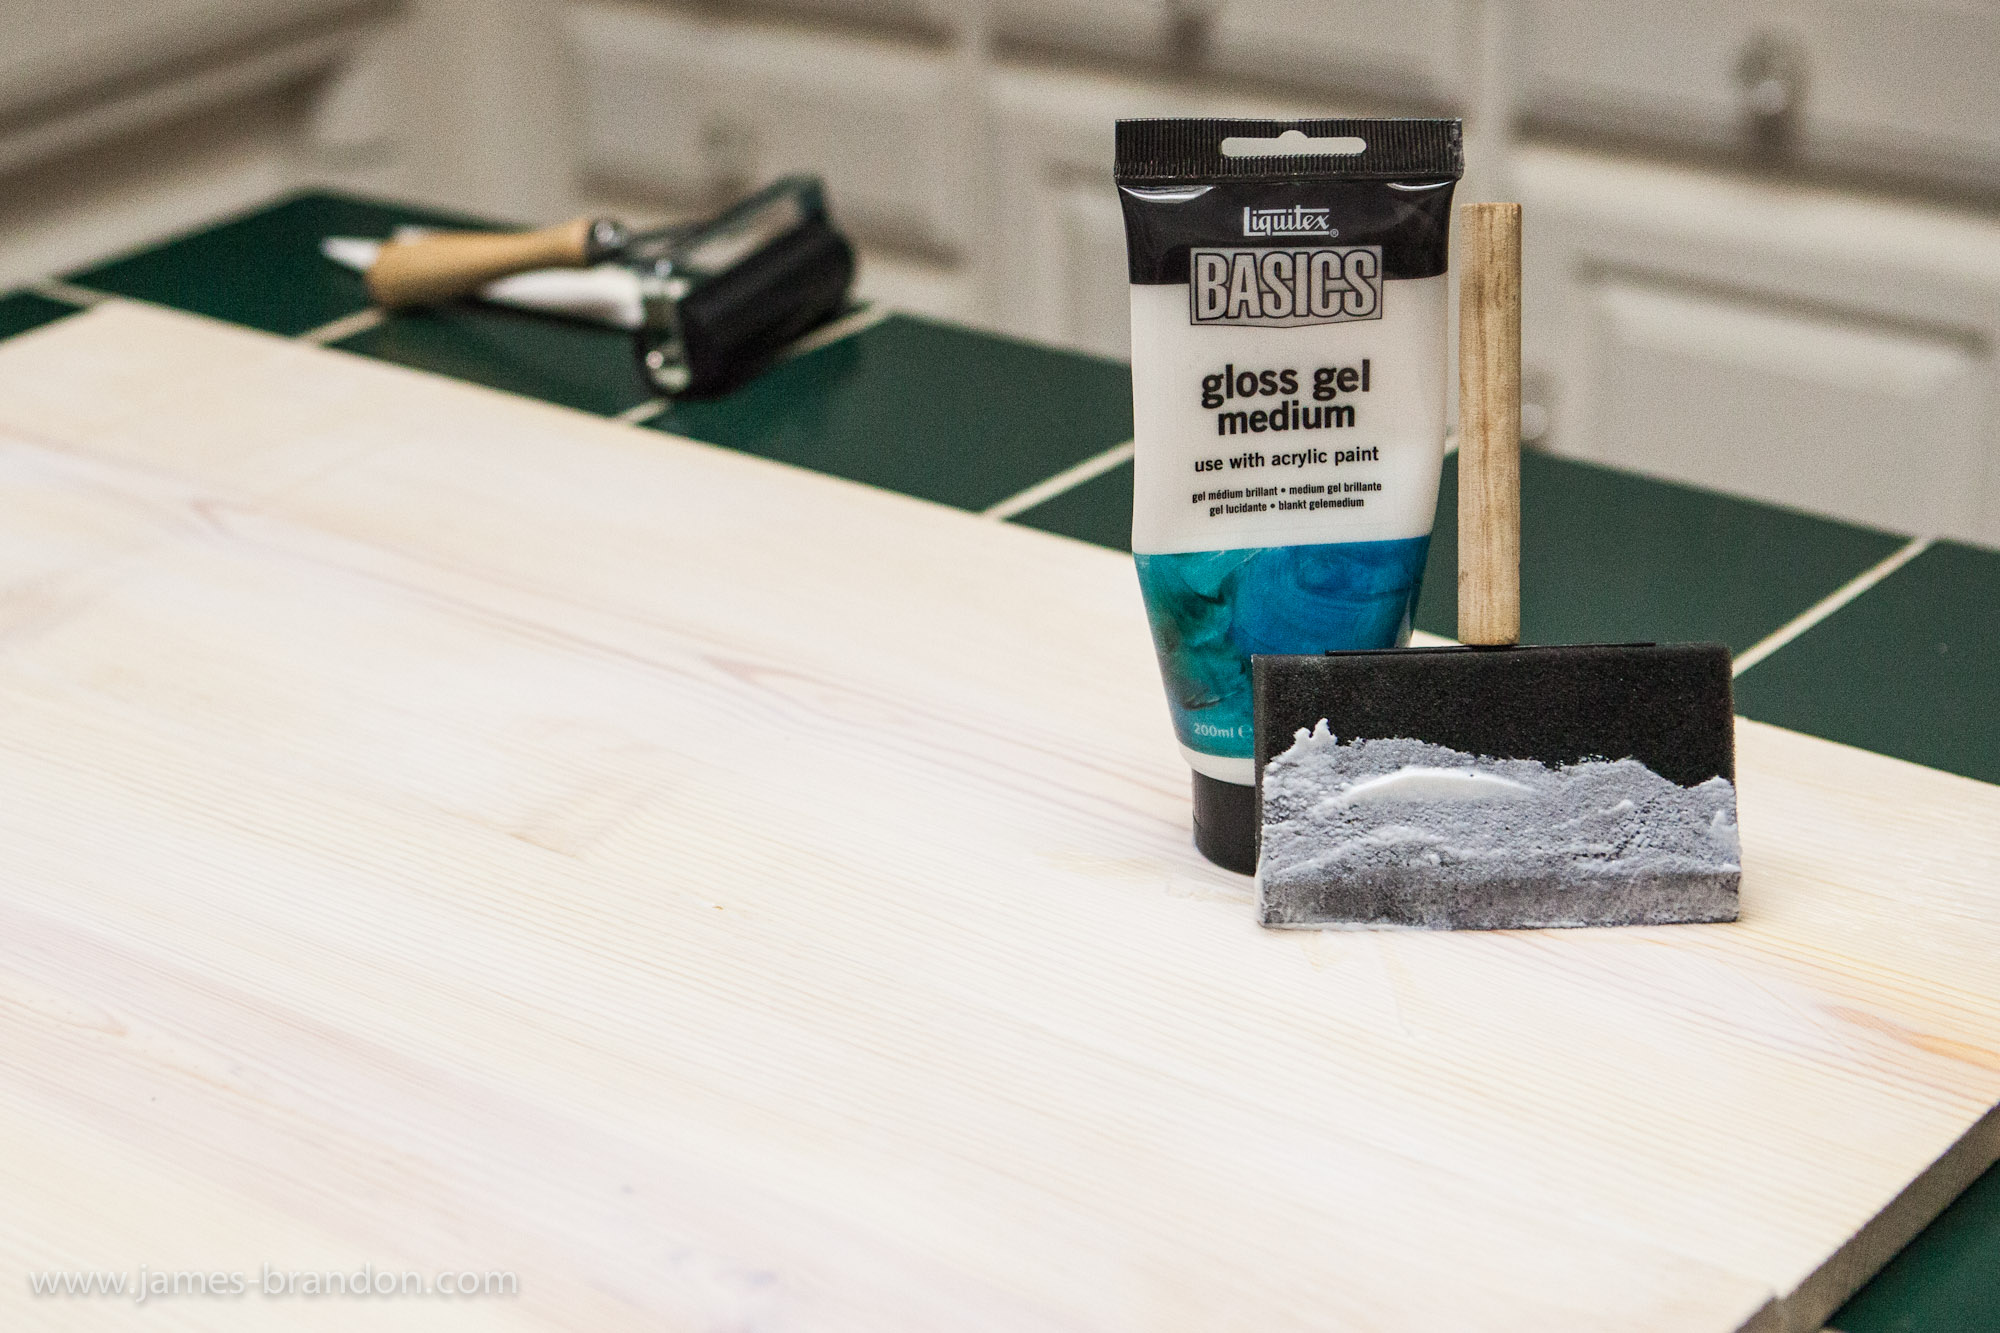
- Gel Medium (has to be an acrylic gel medium)
- Small paintbrush to apply the gel
- something to smooth out print onto wood (a butter knife will do)
- Sander or sand paper
… then the optional stuff:
- Wood stain and rags
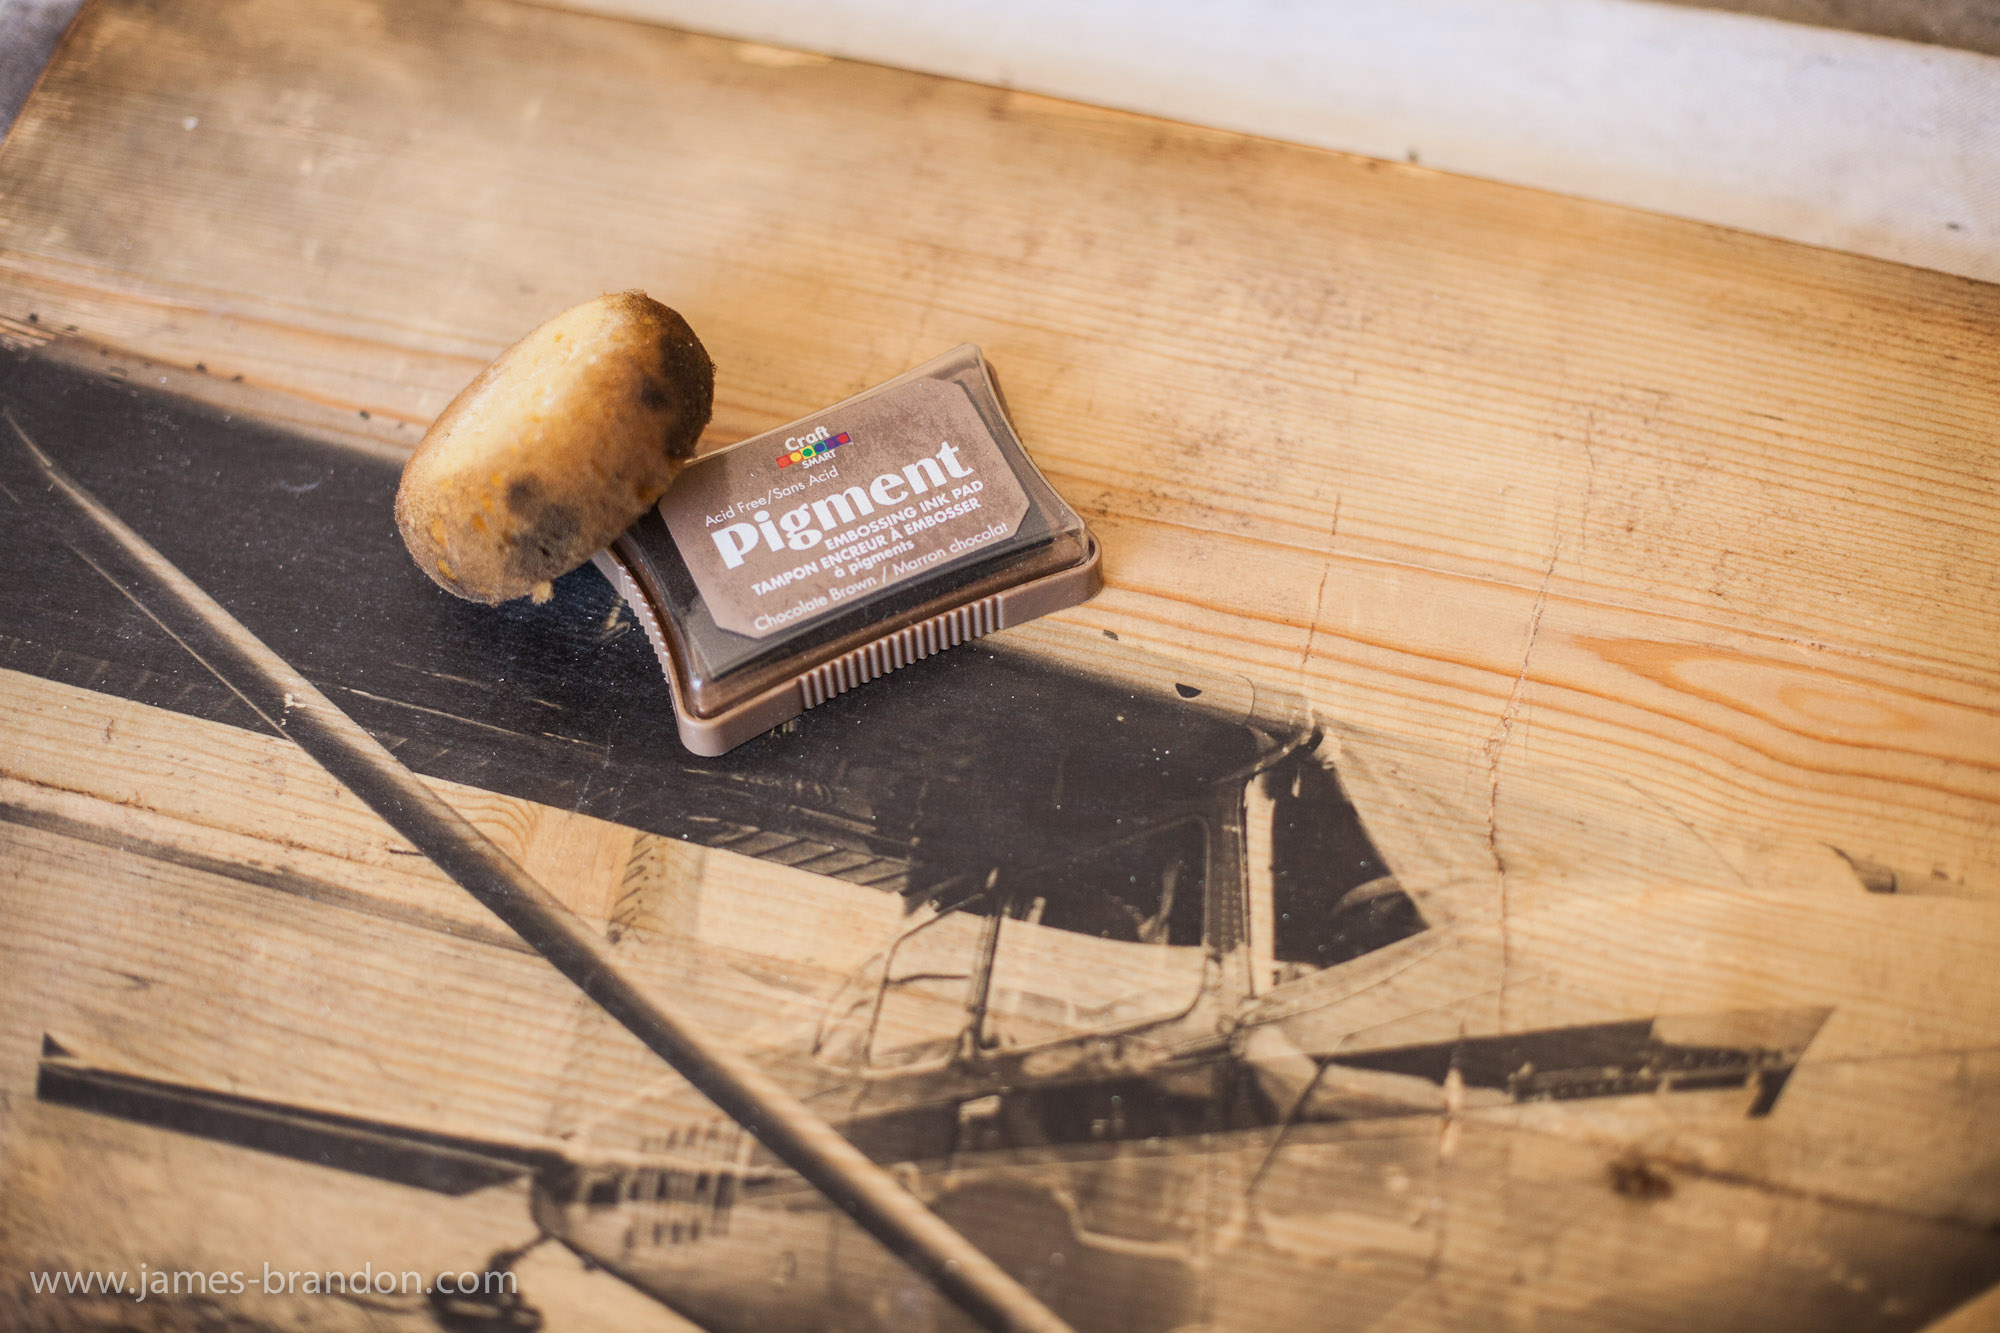
- Pigment (even darker than wood stain, will have a similar effect)
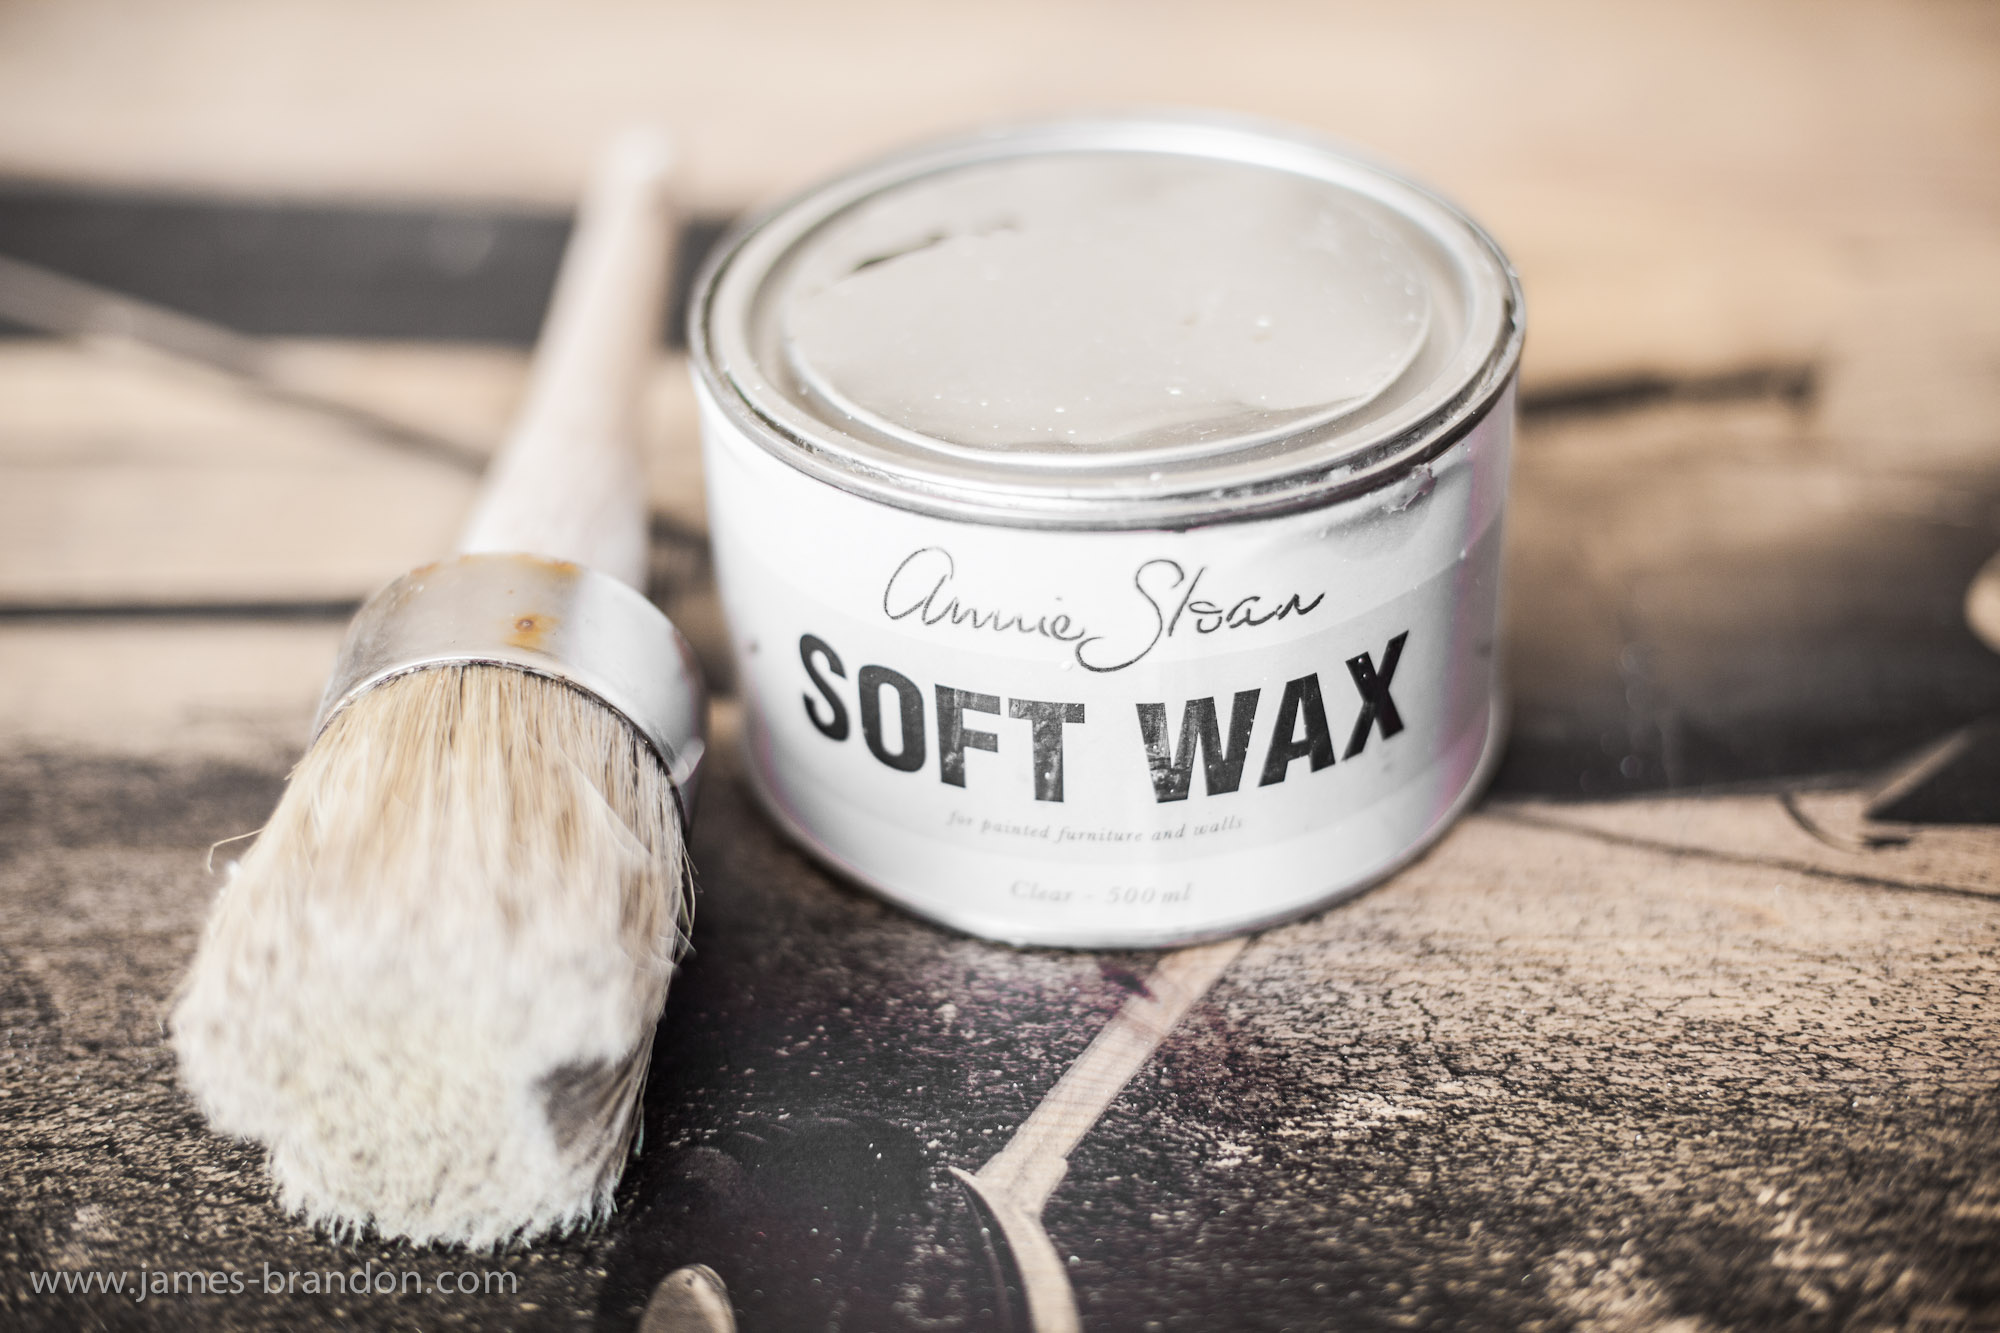
- Soft Wax or Mod Podge to smooth and seal print
- Paintbrush to apply wax
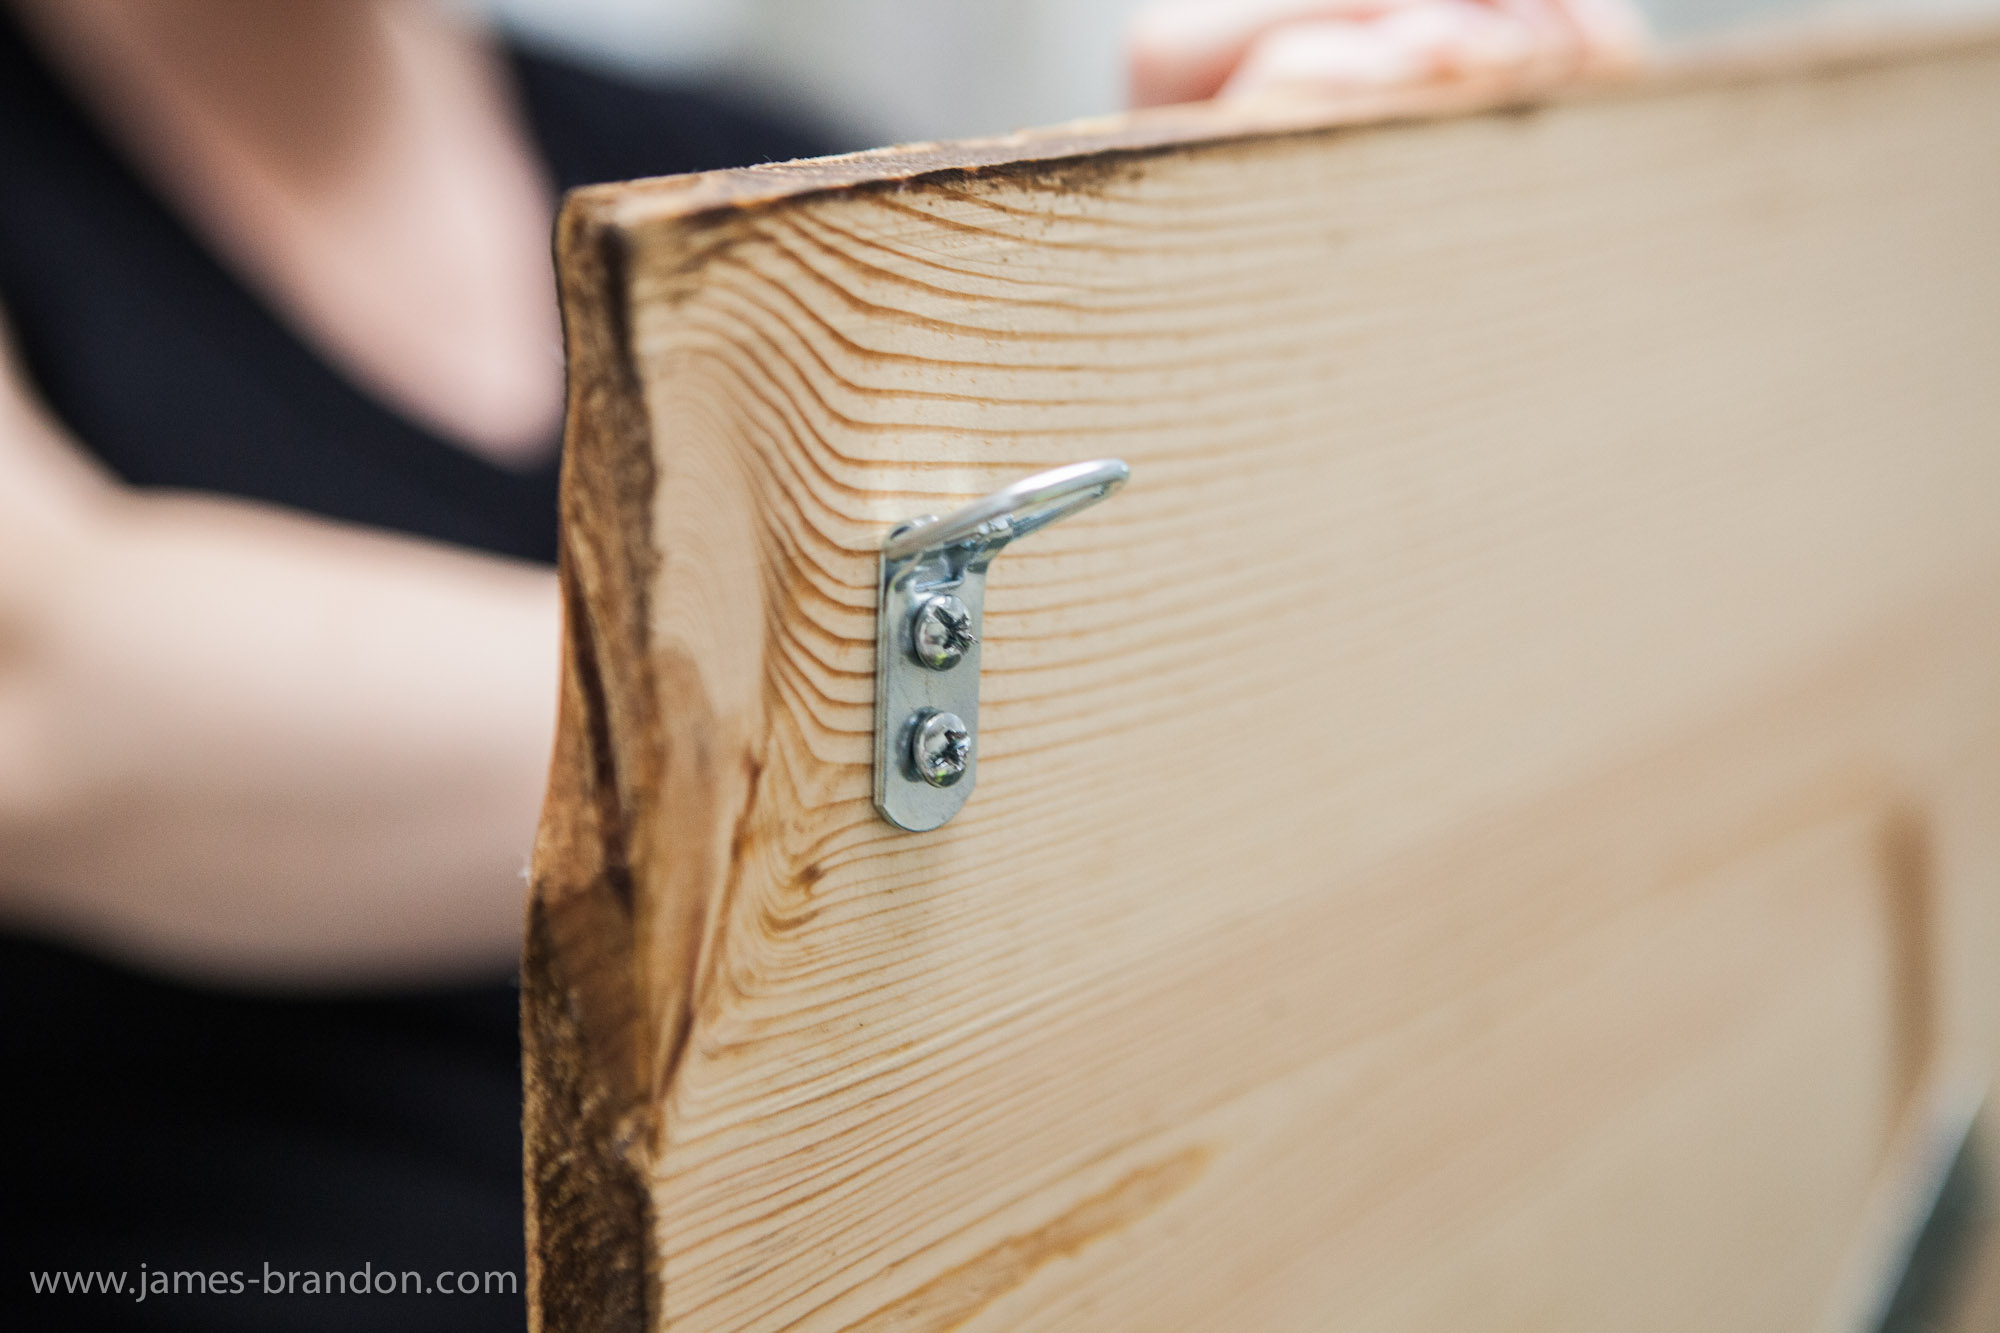
- Hanging brackets (if you want to hang it on a wall)
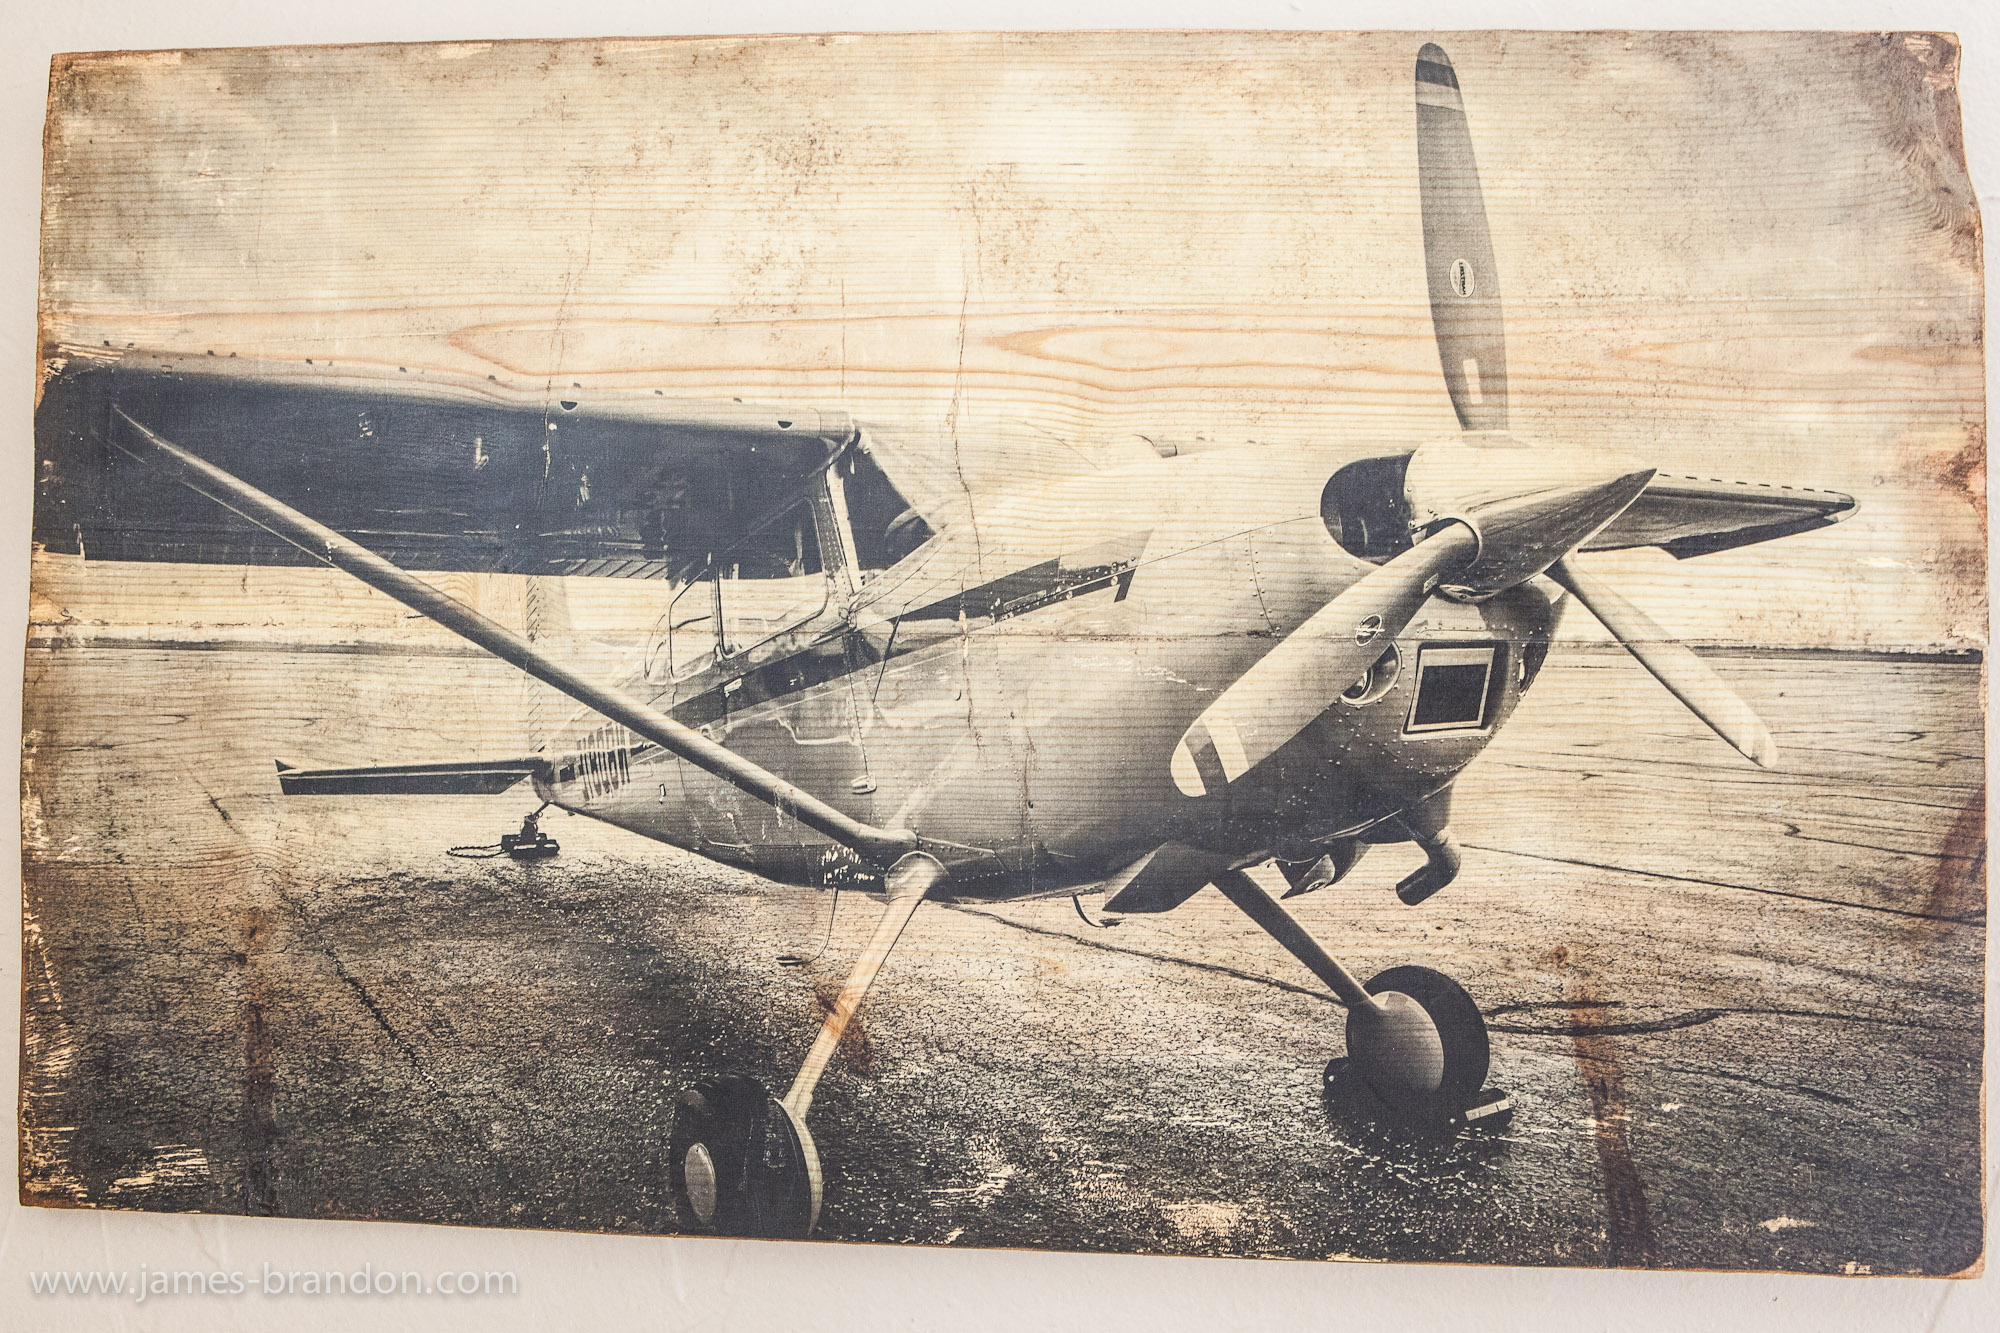
#2 — Find a suitable photo and choose a look that’ll fit in your room
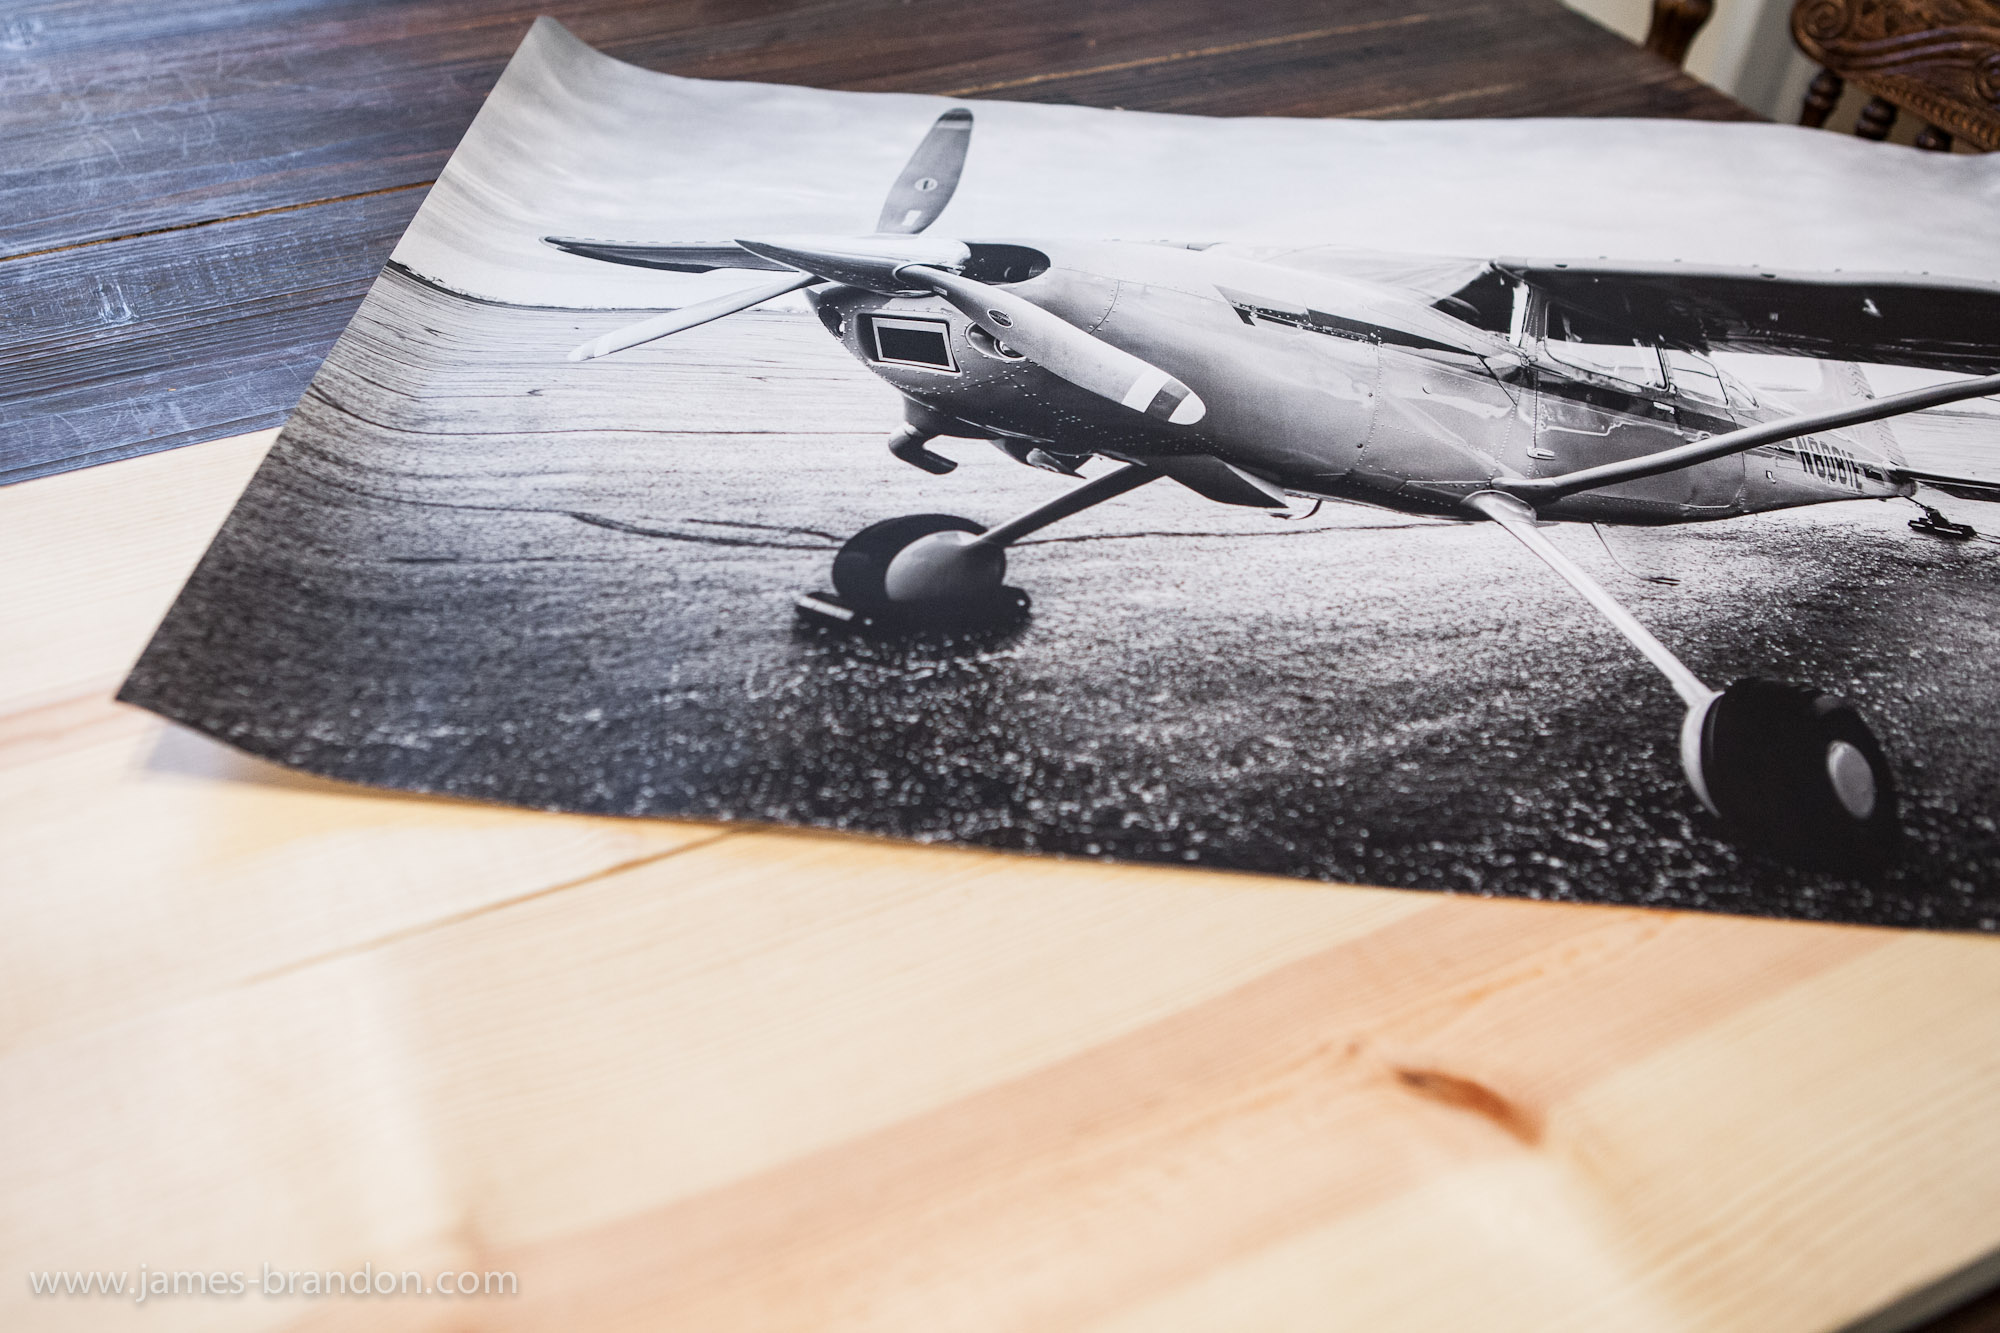
The first actual step is to find a photo and a style, you like to look at daily. Probably because of the uniqueness of a real wooden grade surface, your high resolution true-color photos wont work as well, as the simple black and white vintage prints, from years ago. With an image editor you can convert any photo to black and white, with as much contrast as you needed.
#3 — Get it printed and get some wood
You have to get your photo laser printed, an image made by ink jet wont work, so just don’t waste your time by trying it. If you have no laser printer at home, you would be able to get some help at a print shop and it is relatively cost effective.
The wood doesn’t need to be fancy, you can get it at the hardware store fairly cheaply or even ask your friends for some old planks. If you want, you can cut it to the exact same size of your print or you could leave a natural looking margin for a frame. Remember you probably will see it every single day, so do it in the way you like it best.
#4 — Get the print onto the wood
The following steps are not only the most crucial ones but also the most nerve-wracking. So better get a nice cup of tea before you start, as there is not much time between steps.
At first you have to apply the gel medium to the wooden surface. When you left a frame, you don’t need to cover that bit as well. But it have to be a nice even layer of gel, without gaps or areas where the gel is too thick. When the layer is absent or too thin, the print may not stick to the wood properly, when it’s too thick it’ll be hard to remove the paper once it’s set.
After the gel layer is finished you have to place the print, face down, on the wood. Imagine applying a protective film to your phone’s screen — it’ll be as nerve-wracking as this …
Don’t worry, just do your best and smooth the air bubble out afterwards. You can use nearly any tool, from a roller or a butter knife to a Lego brick if you want. Something made from plastic may be best, because it wont scrape the paper off.
Now the print needs to sit and dry for a few hours, so once the image is applied to the wood, you can get another cup of tea.

#5 — Removing the paper, revealing the print
After the most nerve-wracking steps comes the fun part, just use your fingers to rub off the paper. The only thing we should tell you before is, that this is a messy process, so better have a vacuum cleaner standing by.
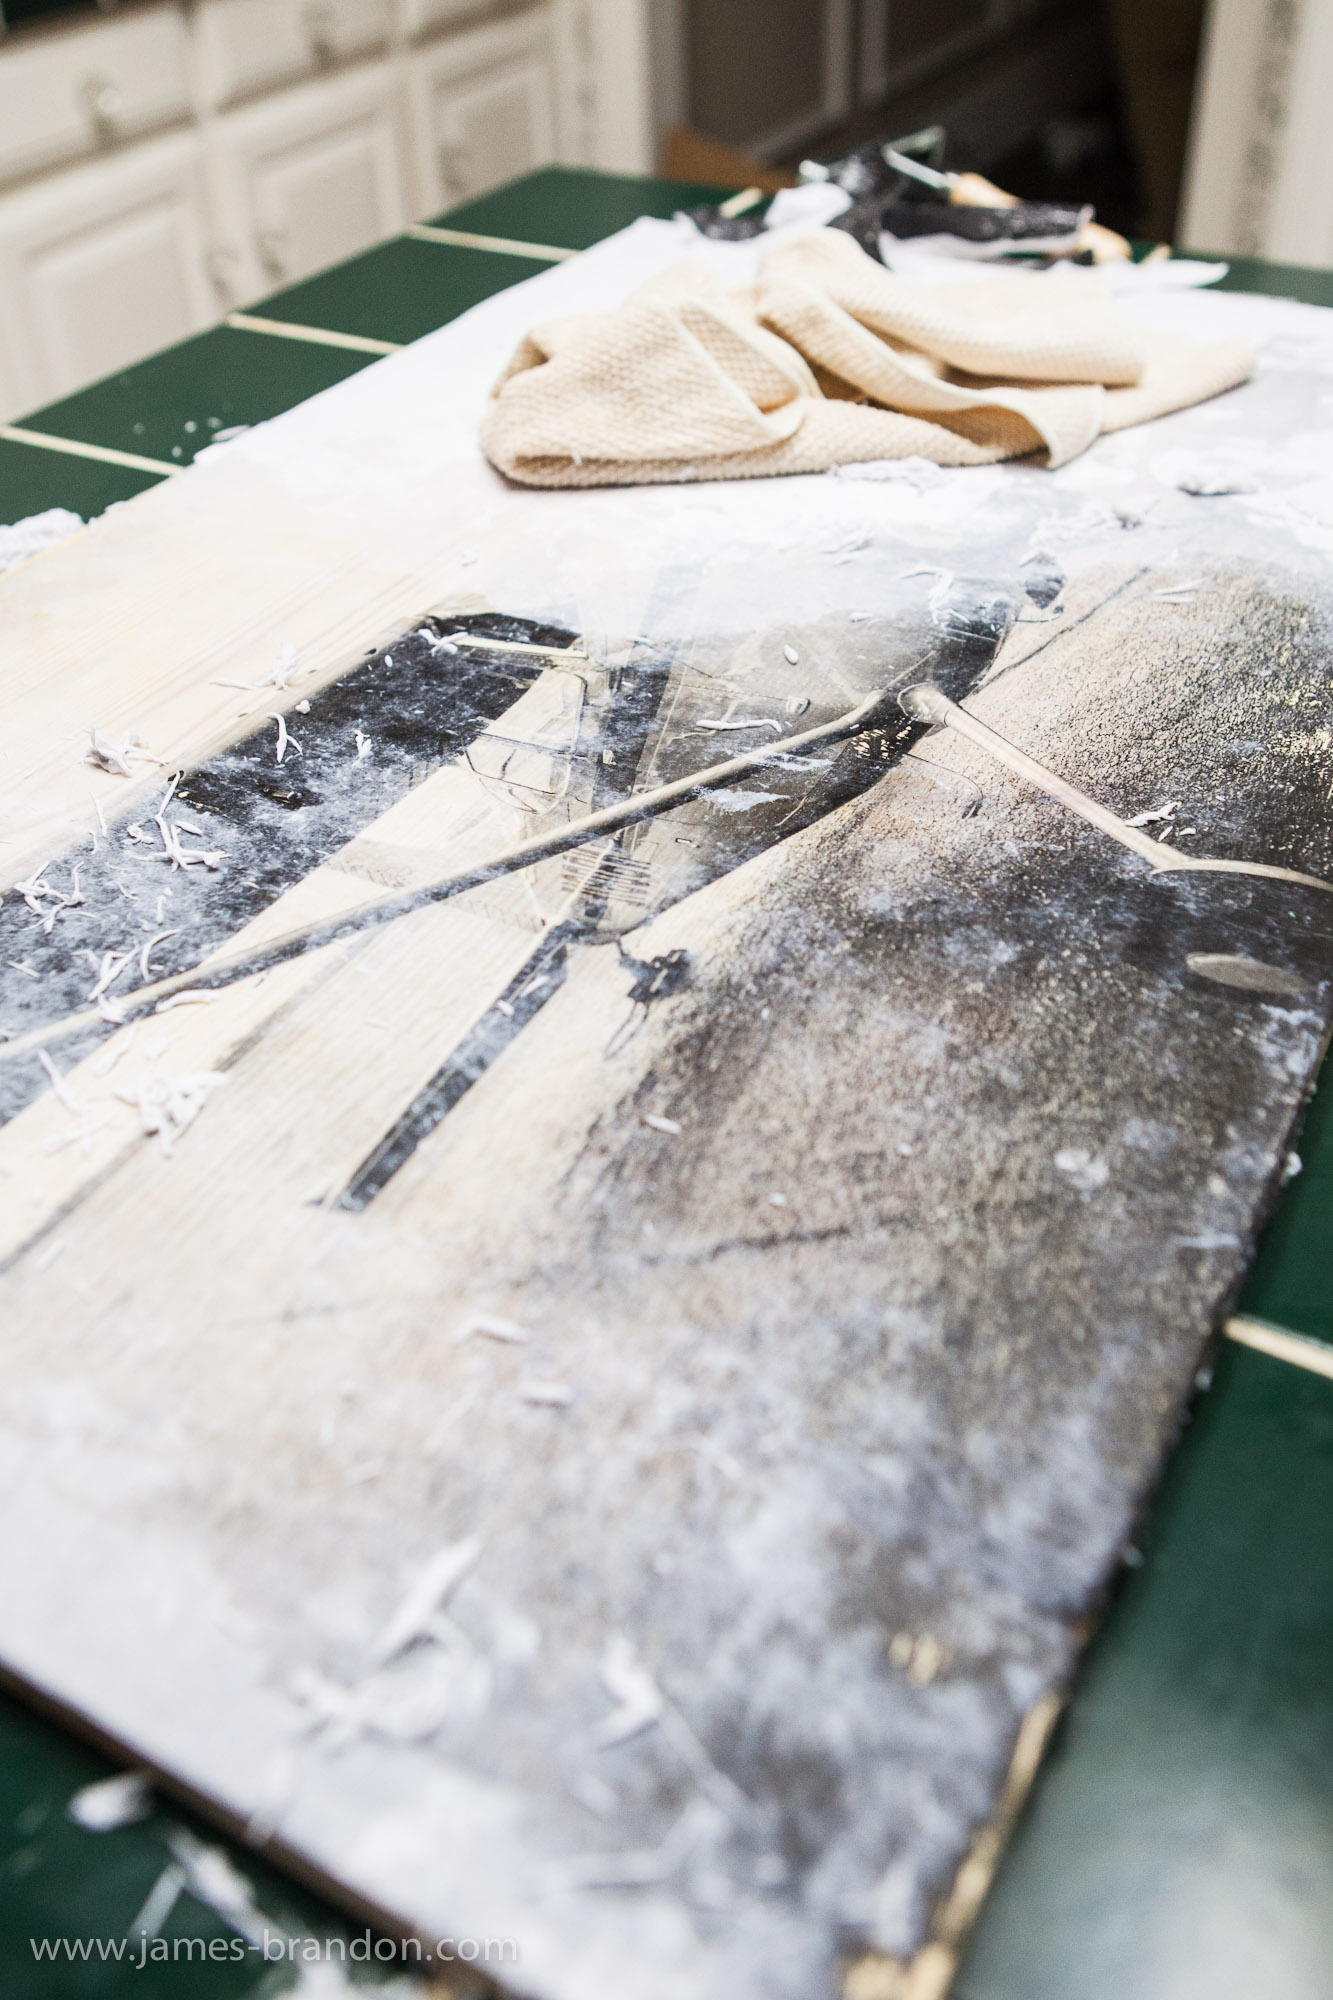
Some parts of the paper will come of a lot easier than others, but it’s the best part when you see the print come to life on the wood. Depending on the size of your print it will take some time and you might have to do it several times to completely uncover the image.
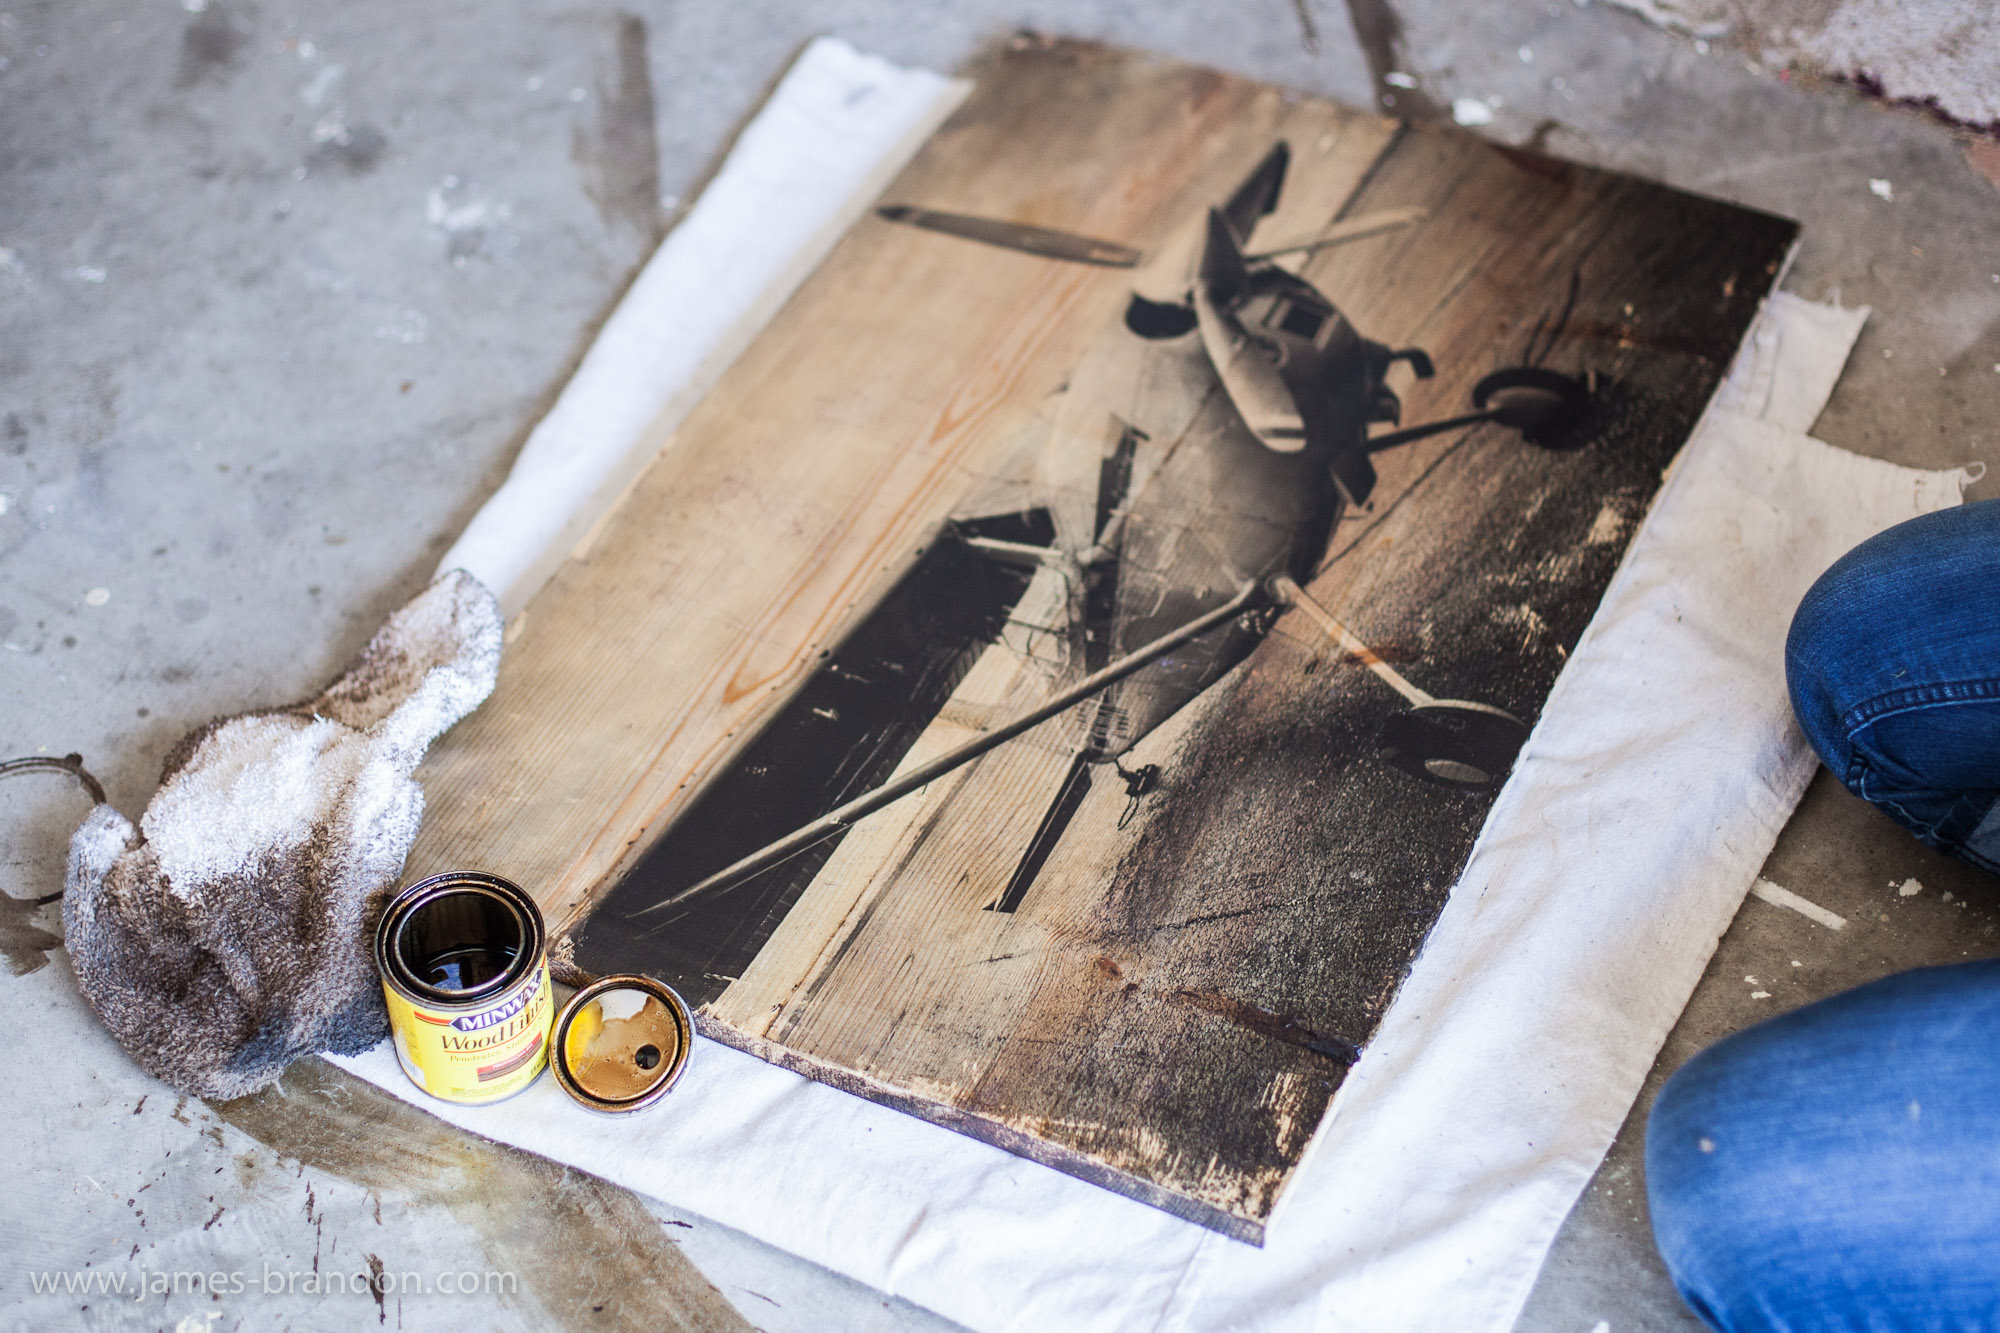
#6 — Finish the print
In this step you can get creative, to achieve the final look. Apply some wood stain and rub it off again quickly. The longer you leave it on, the darker the stains effect is, usually a few seconds are enough.
Next step would be to sand the surface — if you want. A non-sanded surface will look more natural while a sanded surface will get that smooth look like new furniture. Sanding will further remove the excess gel and will make the edges smooth so nobody will get a splinter when touching it.
If you like you can repeat the steps with something called Pigment. It will be a lot darker than the stain, so be careful and maybe don’t use it on the complete area.
To finish the print you can seal the wood with wax. Use a brush to apply, let it dry and then take a cloth to smooth it out. There are different waxes available, from glossy to matte. When you have a very bright room it could be good to take a matte one and vice versa.
#7 — Hang it on the wall (if desired)
The print itself is finished, now it’s time for the placement. When you want it to sit on your desk you may just fix the two (or more) pieces of wood together using whatever fastening brackets you can lay your hands on. Before screwing it together make sure your screws aren’t longer than the planks are thick, it would look really weird if the tips come out the other side …
When the print is to be hang on a wall you need mounting brackets as well, in fact it’s the same as the fastening brackets. Get some, screw them on and hang it all on the wall.
#8 — It’s done!!!
When summing all up, it’ll come to $50 – 100. By using low cost wax you can bring it further down but wont look as nice as a sealant. And when you do another print, you wont need all the expensive stuff, just get a print, wood and maybe some gel medium.
(h/t: Digital Photography School)